Profiler Example : Use the Resize Image method with a ColdFusion Example
The Resize\_Image\_Example.cfm is a simple script that resizes a
specific image and that code is executed in a loop three times.
Resize_Image_Example.cfm
<html>
    <head>
        <title> This is a resize image example for ColdFusion </title>
    </head>
    <body>
        <h2>Now we are going to resize an image and see the performance loss</h2>
        <cfloop from="1" to="3" index="i">
            <cfimage action="resize" source="/opt/applicationservers/coldfusion/11.0/cfusion/wwwroot/Test/cf-family-marquee-v2-1440x810.jpg" height="1500" width="1500" name="resized">
        </cfloop>
        <cfoutput>
            This is the new image after the resize: #resized#
        </cfoutput>
        <cfimage action="writeToBrowser" source="#resized#">
    </body>
</html>
Firstly we will need to add the Resize\_Image\_Example.cfm file
inside our source code directory. After implementing this step, we can
now execute the example and see the results.
Profiler Results
After the execution of the Resize\_Image\_Example.cfm script,
navigate to: FusionReactor > Profiler > Profile History and
you will be able to see the transaction that took part. See screenshot
below.

From the screenshot above, you can see a number of useful information about the transaction that has occurred such as:
- Time the transaction took to complete.
- The description / URL of the transaction,
- Which application the transaction was in.
From the screenshot above, you can see a number of useful information about the transaction that has occurred such as:
- Time the transaction took to complete.
- The description / URL of the transaction,
- Which application the transaction was in.
If you click on the following icon ( See below ) you will be taken to another page which lists the Transaction Details. ( See below icon )

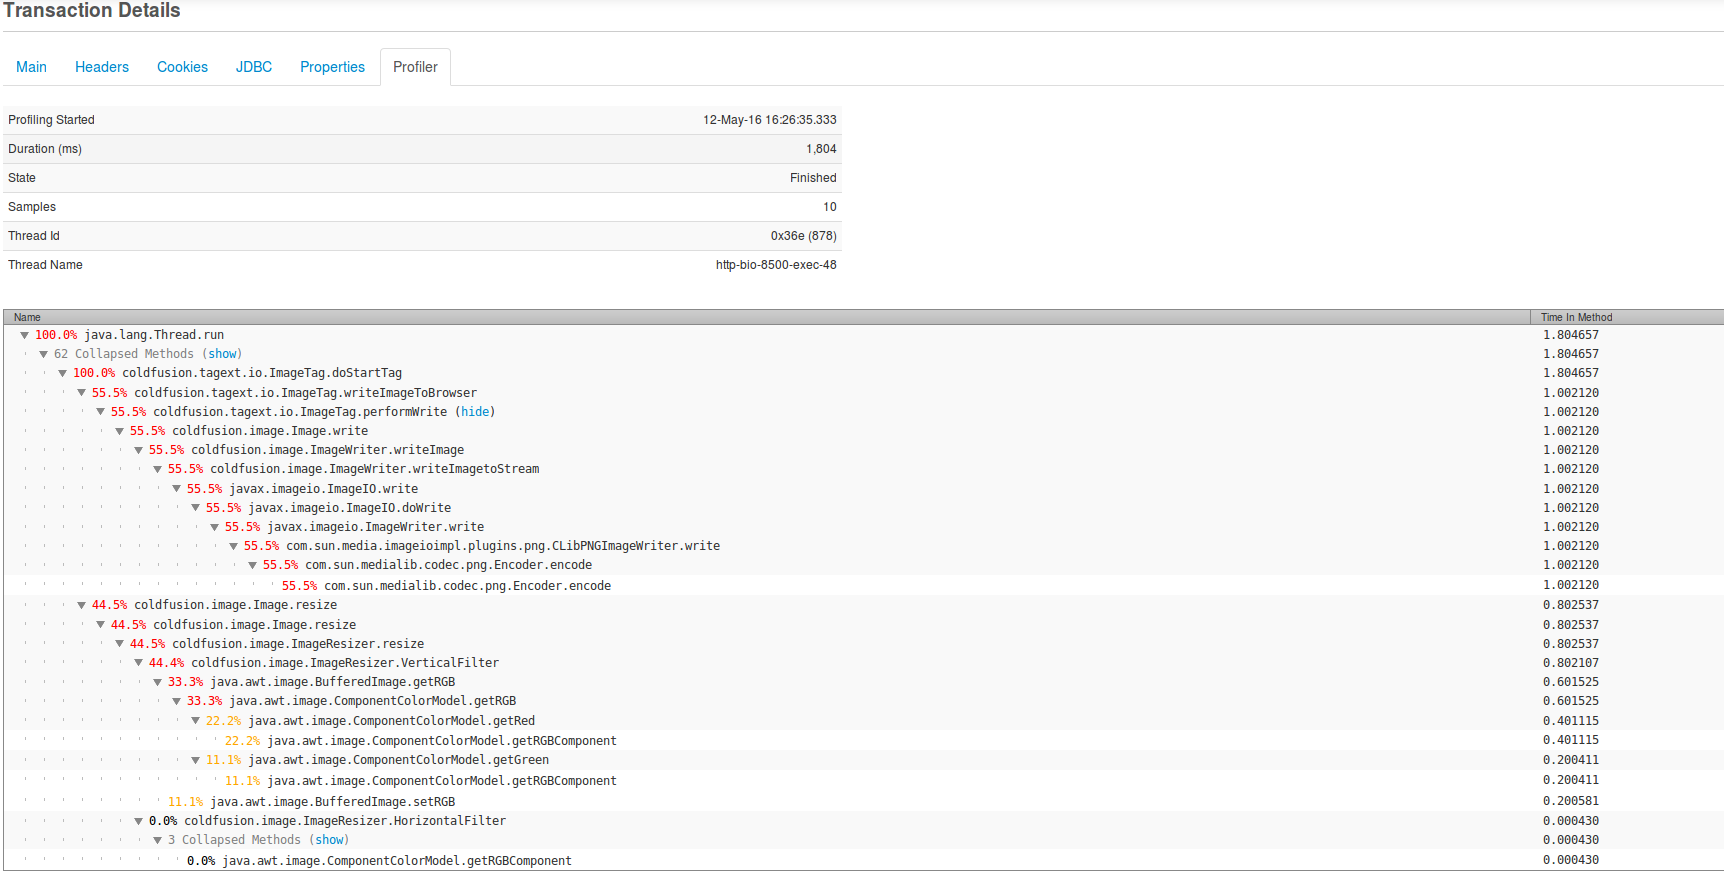
By viewing the screenshot, we can see that 55% of the total Duration
time was consumed by the
coldfusion.tagtext.io.ImageTag.writeImageToBrowser that simply
displays the resized image in your preferred
browser. The second most consuming function was; Image.resize
that resizes the image according to the
arguments specification.From all the above we can understand why
the transaction took 1.8 seconds to complete and which functions
consumed most of the time. Now we know that the use of the image resize
method is time consuming, the performance of the function is not good
and by the use of that our website becomes much slower.