Manual installation of FusionReactor
Manually installing FusionReactor requires you to directly place the FusionReactor installation files and configure the JVM arguments on your application servers.
Note
Installing FusionReactor manually requires some knowledge of your application server configuration and can be completed in just a few minutes.
Tip
For environments with VMs or containers like Hypervisor, Kubernetes, or Rocket, scripting the FusionReactor installation and automating deployment of the latest version is ideal.
Installing FusionReactor
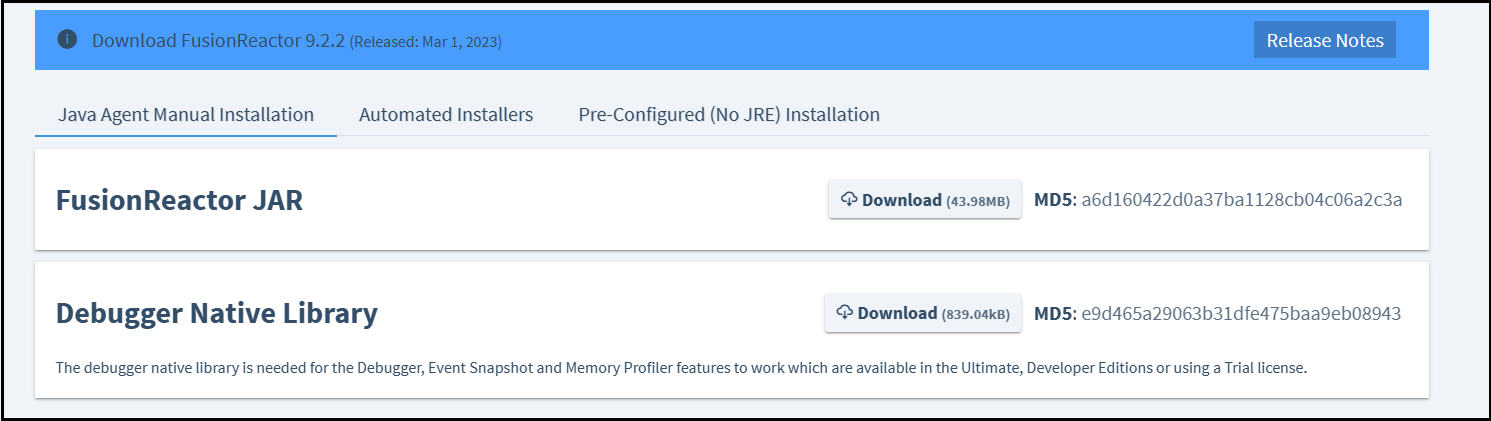
Step 1: Create the FusionReactor directory and download installation files
Create the recommended directory structure /{FusionReactor root}/instance/{Instance Name} to store FusionReactor files (logs, configurations, etc.).
Below is the recommended directory structure:
| Platform | Path |
|---|---|
| Windows | C:\\FusionReactor\Instance\myInstance |
| Linux | /opt/fusionreactor/instance/myInstance |
| MacOS | /Applications/FusionReactor/instance/myInstance |
Warning
Ensure the user running your application server server has read and write permissions to this directory, otherwise you may be unable to start the application server or save any information such as logs or configuration to disk.
Then, download the fusionreactor.jar file and optionally the Debug library (for full functionality in trial, ultimate, or developer editions) from here.
Info
The Debug library is a zip file containing platform-specific libraries (frjvmti_x64.dll for Windows, libfrjvmti_x64.so for Linux, libfrjvmti_x64.dylib for MacOS).
Tip
We recommend installing this argument if you have a trial, ultimate or developer edition to access the full functionality of FusionReactor.
Step 2: Place the FusionReactor installation files into the directory structure
With your directory structure configured, place the fusionreactor.jar and debug lib into your newly created instance directory.
Tip
To make configuring the FusionReactor instance quicker, note down the exact path to these files for example: C:\FusionReactor\Instance\myInstance\fusionreactor.jar and C:\FusionReactor\Instance\myInstance\frjvmti_x64.dll.
Note
You only need to copy the debug library specific to your operating system.
Step 3: Stop your application server
JVM arguments for your application server are only read when the server/JRE (Java Runtime Environment) is started. We recommend stopping your application server before adding or modifying any of your JVM arguments.
Step 4: Add additional JVM arguments to your application server configuration
To run FusionReactor, you must add JVM arguments to initialize the FusionReactor installation files.
-
Add a Java agent path (-javaagent argument) pointing to the fusionreactor.jar file.
-
The Debug native library path (-agentpath argument) needs to be pointing to the debug library.
When entering the Java agent path, specify the address and name that the FusionReactor instance will use.
Tip
The name should describe the application server FusionReactor is installed on, for example cf2018 or tomcat9.
The address should be the port and possible IP address of the FusionReactor instance, for example:
-
address=8088 would bind FusionReactor to the address 0.0.0.0:8088 which is bound to all IP address
-
address=127.0.0.1:8088 would bind to 127.0.0.1:8088 which is only accessible on localhost
Below are some examples of adding FusionReactor to a java process that runs a jar file.
For a comprehensive list of example configurations:
Learn more
Example
Windows:
Example
Linux:
Example
MacOS:
In order to complete the installation of FusionReactor, you must restart your application server for the changes to the JVM arguments to take effect.
Step 5: Start your application server
With your JVM arguments now modified, FusionReactor should start within the Java process.
To confirm this, view your application logs looking for the FusionReactor block as below:
INFO Fusionreactor: --------------------------------------------------------------------------------------
INFO Fusionreactor: FusionReactor - Copyright (C) Intergral GmbH. All Rights Reserved
INFO Fusionreactor: Revision: {version} fusionreactor.xxxxx.xxxxx
INFO Fusionreactor: Date    :  {date}
INFO Fusionreactor: Java    :  {JRE Version}
INFO Fusionreactor: OS      :  {OS Information}
INFO Fusionreactor: --------------------------------------------------------------------------------------
Typically this log is viewed in your catalina.log or ColdFusion-out.log files, but is dependent on your logging configuration.